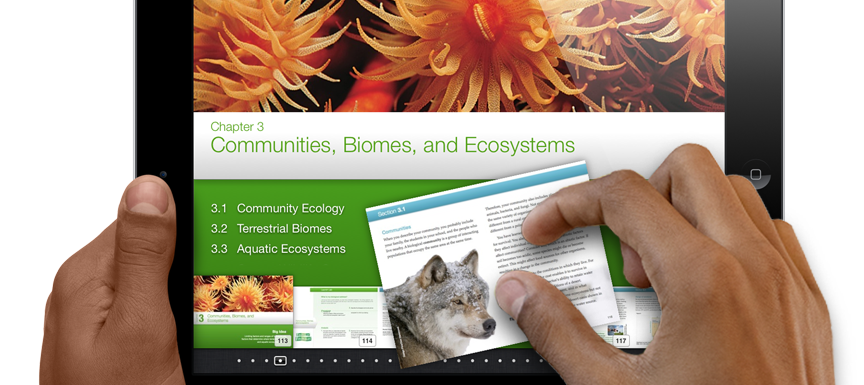
The educational community was all abuzz over the last few weeks about the new interactive textbooks coming out from Apple. Instead of static pictures and text, these new books come alive with audio, video, and interactive diagrams and charts. These interactive texts are viewable on the iPad and other iOS devices.
The creation software, iBooks Author, is a free download for the Mac from the app store (It’s not currently available for the PC). It installs quickly and has the look and feel of Apple’s flagship word processor, Pages. I downloaded the software to my Macbook Pro and decided to take an existing ebook that I published and convert it to an interactive text. The iBooks Author video made it look easy.
Preliminary iBooks Author Tutorial
After working with the software and importing my existing ebook, I would like to give you a preliminary overview of the process. I thought the process would be as simple as importing my existing book, making a few changes and Viola… and interactive book. Unfortunately it’s not quite that easy. Here is what I’ve found so far.
1. Multiple Monitors are a must. If you are going to use iBooks Author, you’ll need a LOT of screen real estate. Unlike working in Pages or Word, creating an Interactive book requires opening a lot of windows and dialog boxes. Trying to do this on my 13” MacBook proved difficult. I soon had a huge amount of screen clutter. Hooking up an external monitor really makes this program come alive. If you have a large screen iMac, you’ll probably be OK. With a MacBook an external monitor is a must.
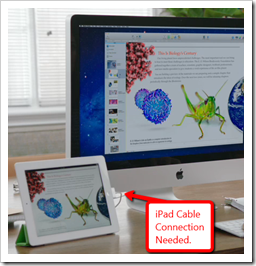
 2. An iPad and connector cable is necessary. To view your compiled book, you will not be able to view it on your Mac. You’ll need an iPad and connector cable to download the iBooks file. The transfer is quick and easy and then you can explore the interactive features. Since this transfer is necessary, you’ll have to change your standard workflow.
I found this to be very clunky at first. I’m used to viewing my finished work with the click of the mouse. With iBooks author you’ll need to export each time to see the changes. Once you get used to it, it makes sense, since only the iPad has a touch interface. If you don’t have an iPad handy, you can also export to PDF which will play on your computer and will give you an idea of page formatting in the final output.
3. Importing is best done one chapter at a time. The iBooks Author program has an import feature that allows you to import existing MS Word or Apple Pages files. While the import works, it doesn’t format existing chapters properly. In my limited exploration so far, I’ve found it easier to import one chapter at a time instead of the entire document. When I tried to bring in my existing book all at one time, I ended up with a mess. So far, I’ve found that having my existing book open in Pages and cutting and pasting one chapter at a time works the best.
4. New file types. In exploring the available widgets, I’ve found some new file types to play with. You can import Keynote files (Apple’s version of Powerpoint) and use the built in animation to create stunning animated diagrams and charts. For 3d models, iBooks Author uses 3D Collada files with a .dae extension. Google SketchUp will create these files. I did a little searching online and found a few examples. Once you get everything together you can build interactive chapter reviews.
Overall: So far this journey has been slow and somewhat cumbersome. Once I added the larger monitor and broke my project into smaller pieces, it’s actually starting to come together. Having an iPad handy, really makes the project come alive. Once I get this done , I’ll post a step-by-step review of the process.
Verdict: If you have a Mac and want to start creating magic, download this free program and start exploring. Start simple and play with the tools. You’ll soon have your first interactive textbook on it’s way to the iBooks store.
Question: Have you tried iBooks Author yet?


