Setting up a standard Facebook account is quick and easy. If you haven’t set one up before, here are the basic steps.
Open a web browser. Facebook works well with Internet Explorer, Firefox, Chrome, and Safari. Go to www.facebook.com and you’ll see the signup screen.
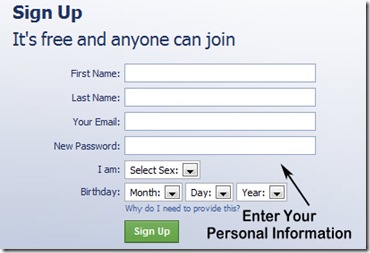
Enter your first and last name along with a current e-mail address. Select your gender along with your birthday. You will be sent a confirmation email to the email address you enter, so make sure you have access to the account to confirm your selections. You can only have one Facebook account per email address.
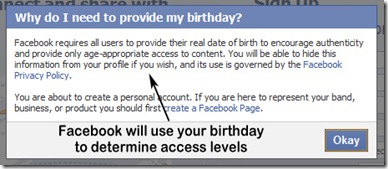
The birthdate you enter will select age appropriate access to your account. The age cutoffs are 13 years of age and 18 years of age. Until their eighteenth birthday, minors will have their information limited to Friends of Friends and Networks. You can hide access to your birthday information in your profile, so this information is made public only if you want to reveal it.
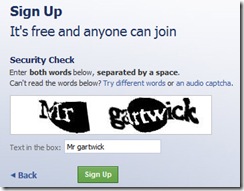
Once you click Sign Up a Catchpa screen will pop up. Enter the two case sensitive words that appear and click Sign Up.
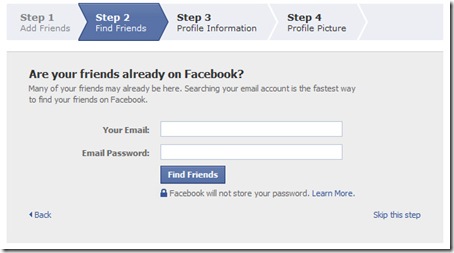
Depending on your computer and email address, You may be presented with suggested friends. Click on any people that you would like to add to your friend list. The next step will ask you to enter your email address and password so Facebook can search your contact list for email addresses of people already on Facebook (Facebook will not store your password). Depending on your account, you will be presented with a list of contacts that you can choose to add as friends. Add those that you know well and feel comfortable with.
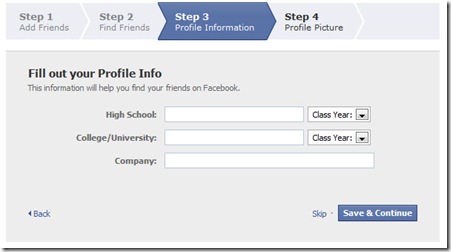
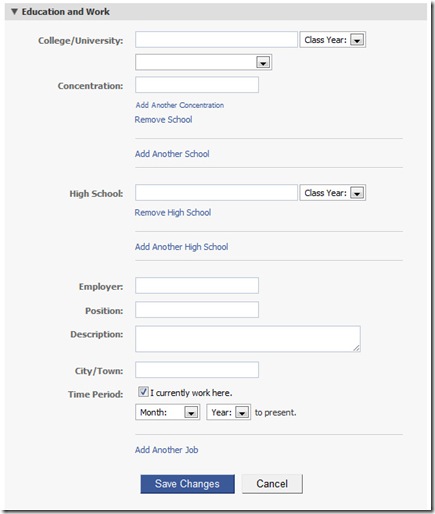
The next step has you add basic profile information including high school, colleges, and places of employment. Facebook will search these institution names and offer suggested friends. You may discover people that you haven’t seen in years. Any friends you select will have to OK your friend request before you can access their profiles.
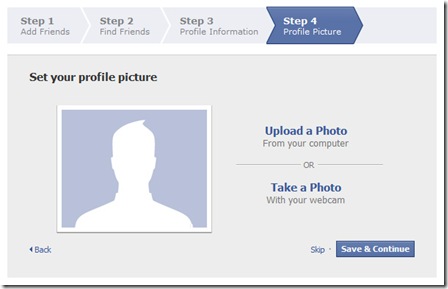
In the last setup step, Facebook will prompt you to add a picture. You can upload one from your computer or capture one from your webcam. The maximum size of the photo that will be displayed is 200 pixels wide by 600 pixels long. If your photo is larger than that Facebook resizes your profile photo down to a 200 pixel width while maintaining the aspect ratio vertically.
If you have Photoshop or other graphics program, you can create a custom graphic in a 200 x 600 size and create a unique look. Rob Banagle has a great post about this on his Facebook blog. I downloaded one of Rob’s templates and created a fun adventure montage for my Facebook page. Here is an idea of what you can create.
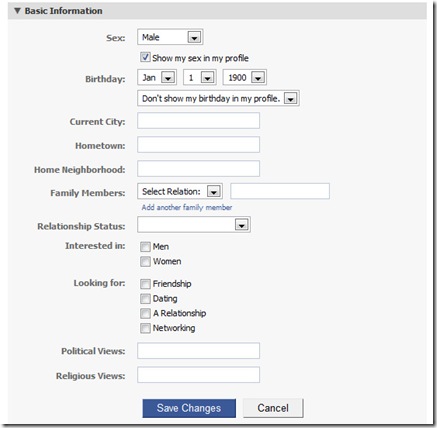
Now that you have a picture uploaded and the basics entered you can go back and fill in the individual profiles.
You can enter as much information as you want. Be aware that this information will be visible to a wide variety of people depending on your security settings, so you may want to leave certain areas blank. Because of security concerns, I would suggest that you not show your entire birthday in your profile.
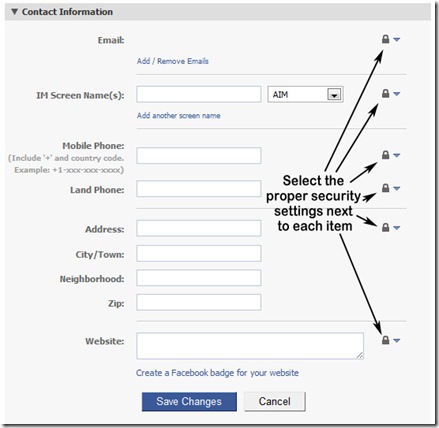
Contact information can be entered and individual security settings selected for each. Be sure to click on the drop downs with the lock icon next to any item you enter, and set the proper access that you feel comfortable with. You can leave these all blank except for the email address.
The education and work screen lets you list your high school, college, and place of employment. Note there are not security dropdowns on these, so don’t list information that you don’t want to be seen on your public profile.
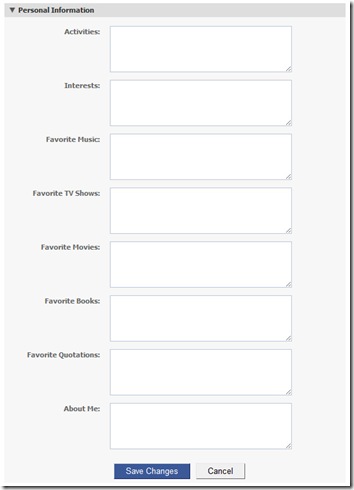
Finally there is the personal information screen. You can list your hobbies, music, TV shows, and other fun information that will help others with similar interests find you. Please note that anything entered here will be visible on your personal profile screen.
Security company Sophos, has a great guide to setting up your Facebook security properly to reduce the chance of Identity theft. Their Facebook best practices guide will help you set each item in the proper manner. Please take a few minutes and make sure your settings are correct.
Once you have entered your info and chosen some friends, your Facebook page will be ready to go. As your friends accept your invitations, they will show up on your Facebook Wall. In our next article we’ll cover how to divide up your friends into groups and make it easier to navigate your page. We’ll even cover how to get rid of the overload of Farmville items!!

