So far in our Kindle Publishing Series we have looked at offline writing tools, different niches to explore, and in our last post, a few popular computer based eBook creation tools.
For the rest of our series, we’ll use a popular writing tool called Scrivener, to create, edit and publish our eBook. This one program allows us to complete the whole project with one tool, to make it easier to follow along. Let’s get started.
For our series, I’m going to use the PC/Windows version of the software for screen shots and step-by-step instructions. The Mac version of the software is similar, and I’ll included separate instructions where necessary.
Scrivener has a free trail available that is good for 30 days. This trial is a full install of the software. To use it past the 30 day mark, you’ll need to purchase a license. The retail price of the PC version is $40, but there are usually specials available for the software. (Currently the code WORDSWITHJAM will save you 20%)
The first thing we need to do is download and install the software.
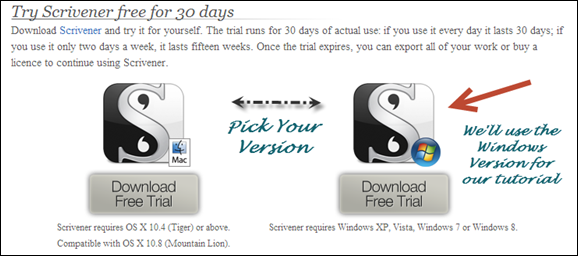
Go to the Scrivener Page and click on the Free Trial Link.
On the trial page, pick the version that matches your computer. For our tutorial we’ll use the Windows Version.
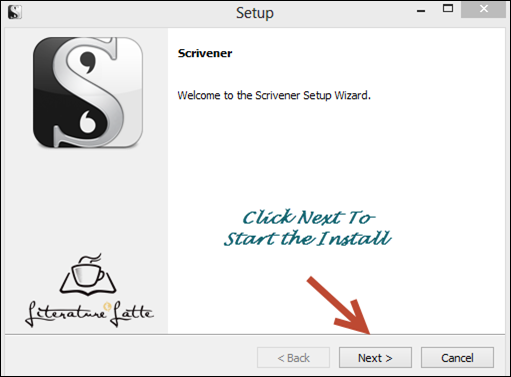
When you click on the link, a file will download on your computer. Click on this link to start the install process.
Click on the software license agreement to continue the install.
Pick the install directory to install the software. The default is usually best.
A final confirm box will come up for the install. Click next to continue.
In a short while the program will load and put icons on your start menu and desktop. Double click on this icon to get started.
In our next post we’ll, look at setting up our first eBook. For now, I suggest you watch the Scrivener Introductory Video link, which will give you an overview of the program and the function of the individual components. You’ll need Quicktime installed on your computer to view the file.
Introductory Video Link (Quicktime File)
Scrivener Tutorial Videos Page
Overall: In our next post we’ll setup a basic non-fiction ebook, install a Kindle File Generator and do a trial output to see how Scrivener works.


